Micro-Measurements’ Comprehensive Class of Special Use Sensors
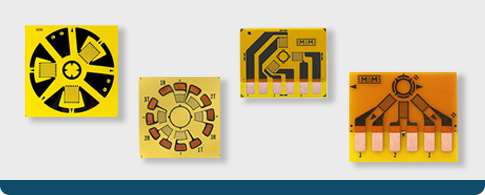
Micro-Measurements’ comprehensive collection of special-use sensors support the critical work of accurately measuring strain in the presence of high magnetic fields, finding internally destructive residulal stresses, reporting fatigue failure causing material cracks and precision measurement.
Structures can, and do, break. It’s critical to determine whether a particular object made from a particular material can carry a particular load. If true stress is ignored, the cost of not acting exceeds the cost of understanding and resolving the problem to begin with. Micro-Measurements offers a wide variety of complementary sensors and designs that help detect stress and prevent catastrophes for stress analysis and transducer customers.
Special Use Sensors: Prevention is the Preferred Solution
A wide range of industries--including Aerospace, Automotive, Transportation, Infrastructure, Medical, Oil & Gas, Nuclear, Agricultural, Consumer, and many others--- count on Micro-Measurements’ special use sensors for enhanced performance and long-term stability.
Available products include:
- Residual Stress Strain Gages
- Magnetic Field Gages
- Weldable Gages
- Shear Modulus Testing Gages
- Concrete Embedment Gages
- Temperature Sensors
- Crack Detection Sensors
- Crack Propagation Sensors
- Displacement Sensors
Let’s Collaborate on a Custom Solution:
Micro-Measurements recognizes the need for gages specifically tailored for your unique needs. We are pleased to manufacture custom strain gage sensors for both stress analysis applications and transducer class customers.
RESIDUAL STRESS GAGES
The most widely used practical technique for determining residual stresses is the hole-drilling strain gage method. A specially configured strain gage rosette is bonded to the surface of the test object. A small, shallow hole is introduced into the structure, through the center of the gage, using a precision drilling apparatus. Strains in the immediate vicinity of the hole are measured, and the relaxed residual stresses are computed from these measurements.
Learn more about the general theory of making residual stress measurements in Micro-Measurements Tech Note TN-503, “Measurement of Residual Stresses by the Hole-Drilling Strain Gage Method.”
CRACK DETECTION AND CRACK PROPAGATION
CRACK DETECTION • CRACK PROPAGATION
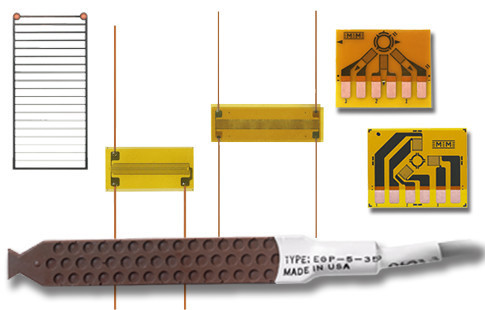
CD-Series Crack Detection Gages are expertly designed to provide a convenient, economical method of indicating the initiation presence of a surface crack.
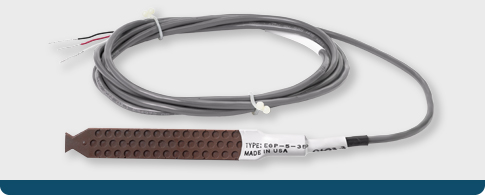
The CPA, CPB, and CPC patterns consist of a number of parallel resistor strands, when broken indicate the rate of crack progression or propagation. When bonded to a structure, progression of a surface crack through the gage pattern causes successive open-circuiting of the strands, resulting in an increase in total resistance.
MAGNETIC FIELD STRAIN GAGE
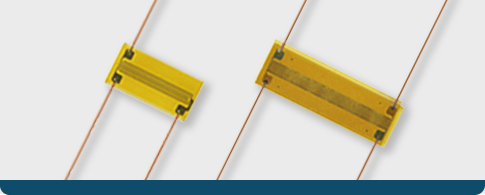
Intense electromagnetic fields with steep gradients in field strength can cause troublesome noise in strain gage circuits. In severe magnetic environments, with low signal levels, the noise amplitude may be several times larger than the strain signal from the gage. Micro-Measurements H-Series non-inductive strain gages have been specially designed to minimize noise pickup in the gage grid due to electromagnetic fields. H-Series strain gages consist of two identical grids, with one stacked directly above and insulated from, the other, an arrangement that allows noise voltages to be self-cancelling.
H-Series strain gages are veryy sucessful in fusion research applications and similar environments with flux densities to 50,000 gauss.
DISPLACEMENT
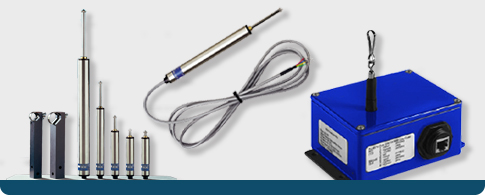
Cable-Extension Displacement Sensor (CDS) • Linear Displacement Sensors (HS Series)
The Micro-Measurements Cable-Extension Displacement Sensor (CDS) provides a voltage signal linearly proportional to the extension of a retractable stainless steel cable. Used for indicating the displacement of the test structure, member or part to which the cable is attached, installation is quick and easy.
Micro-Measurements Linear Displacement Sensors (HS Series) use a fully active 350-ohm strain-gage bridge to sense spindle displacement, giving infinite resolution and excellent linearity. They are compatible with all standard strain-gage instrumentation with bridge excitation from 2 to 10 volts. With a selection of models having full-scale ranges from 1/4 inch (5 mm) to 4 inch (100 mm), Linear Displacement Sensors feature a unique design that produces maximum operating forces of less than 1 lb. (4.4 N).
SHEAR MODULUS
Shear Modulus Sensors are specifically designed to accommodate the unique specimen geometries and strain-field distributions encountered when testing composite materials for shear properties. Two gage sizes are available, in both planar and stacked shear rosette configurations, for the Iosipescu and Compact test specimens.
Determining shear modulus requires extracting an average shear-strain value from the non-uniform strain field present in both specimen sizes. Since strain gages have the unique characteristic of integrating the surface strain field under their grids, average specimen strain is automatically obtained by spanning the entire length of either specimen’s test section.
TEMPERATURE (RTD)
Micro-Measurements’ high-precision resistance temperature sensors use nickel rolled foil grids. For temperature compensation circuits used in full-bridge transducer applications, Micro-Measurements offers and are also available in Balco® alloy or copper foil grids. These temperature sensors are bonded to structures using standard strain gage installation techniques, and can measure surface temperatures from –452° to approximately +500°F (–269° to +260°C). Because of their extremely low thermal mass and the large bonded area, the sensors follow temperature changes in the structural mounting surface with negligible time lag.
CONCRETE EMBEDMENT
The EGP-Series Embedment Strain Gage is specially designed for measuring mechanical strains inside concrete structures. The sensing grid, constructed of a nickel-chromium alloy (similar to Karma), has an active gage length of 4 inch (100 mm) for averaging strains in aggregate materials. A rugged 5 inch (130 mm) outer body o resists mechanical damage during pouring, matches stiffness of the concrete, thus eliminating the presence of an introduced ‘void’ in the material, and provides sustained protection from moisture and corrosive attack.
PRESSURE PULSE
Micro-Measurements offers a large selection of gages for shock wave studies, manufactured from specially treated shunt stock Manganin foil. Manganin gages are used extensively in high-pressure shock wave studies ranging from 1 to over 400 kilobars (1 bar = 14.5 psi = 100 000 N/m2). In conventional applications, the gage is bonded between two flat metallic or polymer plates. The ultrathin construction offers several advantages over the wire type, including:
- Improved repeatability from gage to gage
- Faster response times
- Smaller, high resistance grids
- Minimal distortion of the pressure wave

RESOURCES
Learn about our stress analysis products, watch informative videos, and explore our large knowledge base.

STRAINBLOG
Questions and answers on the go! Listen to Micro-Measurements experts explain the many facets of strain gage technology.
TRAINING
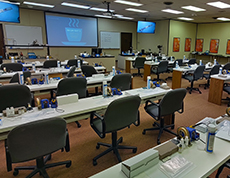
Benefit from an extensive series of regularly scheduled, hands-on technical workshops and short courses.

VIDEOS
Explore our extensive collection of tutorials and informational videos on a variety of strain measurement topics.
hard work text toCJ"PS mgfokrskgbvkrpogb dopkg
s aushgiuhfgiuhdsroijgoidjrsigojdsg
ghiushguisrhuighsu idhgiusd


